Motors & Roboticsbeginnerproject build
Build a Bluetooth-Controlled Robot Car with Arduino: Step-by-Step Guide
Build a Bluetooth-controlled robot car with Arduino, an HC-05 module and an L298N motor driver: parts list, circuit, code and testing.
By ADIY10 min read
Technical review pending. Figures marked “verify” or “check your part” have not been confirmed against your exact hardware revision. Check the manufacturer datasheet before relying on them in a design.
1. Introduction: Why Build a Bluetooth Robot Car?#
Welcome to another comprehensive guide from the ADIY Labs! If you are a student looking for a final year engineering project, or a hobbyist eager to dive into robotics, building a Bluetooth robot Arduino car is the perfect starting point.
This Arduino robot project combines mechanical assembly, basic electronics, wireless communication, and embedded C programming. You will learn how to send commands from your smartphone to an Arduino over Bluetooth, which then translates those commands into motor movements using an L298N motor driver.
We are going to build a differential drive robot, meaning it steers by driving the left and right wheels at different speeds or in different directions. Let's get started on building your very own robot car India style, using easily accessible and affordable components!
2. Complete Bill of Materials (BOM)#
Before assembling, gather the following components. Most of these are readily available on the ADIY store under the Make in India initiative.
| Component | Qty | Purpose | Approx. Price (₹) |
|---|---|---|---|
| ADIY UNO R3 | 1 | The brain of the robot | ₹ 450 |
| HC-05 Bluetooth Module | 1 | Wireless communication with smartphone | ₹ 250 |
| L298N Motor Driver | 1 | Drives high-current DC motors | ₹ 150 |
| BO Motors (Geared DC) | 2 | Provide motion to the wheels | ₹ 120 (Pair) |
| Robot Chassis Kit | 1 | Frame, wheels, and caster wheel | ₹ 200 |
| 7.4V Li-ion Battery (2x 18650) | 1 | Power supply for motors and Arduino | ₹ 300 |
| Jumper Wires (M-F, M-M) | Set | Connecting components | ₹ 60 |
3. How HC-05 Bluetooth Module Works#
The HC-05 Arduino project integration is extremely popular because the HC-05 module is inexpensive, reliable, and uses the simple UART (Serial) protocol.
The HC-05 acts as a serial bridge. When you send a character from your phone's Bluetooth terminal, the HC-05 receives it wirelessly and transmits it via its TX pin to the Arduino's RX pin. Conversely, Arduino can send data from its TX pin to the HC-05's RX pin, which then transmits it back to your phone.
4. Chassis Assembly Notes#
Building the physical structure is the first step in our Arduino robot project.
- Mount the Motors: Fasten the two BO motors to the rear of the acrylic chassis using the provided long screws and T-shaped brackets.
- Attach the Caster Wheel: Fix the omnidirectional caster wheel to the front center of the chassis using brass standoffs. This provides balance.
- Install the Wheels: Press-fit the plastic wheels onto the BO motor shafts.
- Mount Electronics: Use double-sided tape or screws to mount the ADIY UNO R3, L298N, and battery pack onto the top deck of the chassis.
5. Full Circuit Diagram Description & Wiring Table#
Now, let's wire everything up. The L298N motor driver is essential because the Arduino's digital pins cannot supply enough current (only ~40mA) to drive motors directly.
L298N Motor Driver Wiring#
| L298N Pin | Connection |
|---|---|
| 12V Input | Battery Positive (+) |
| GND | Battery Negative (-) AND Arduino GND |
| 5V Output | Arduino 5V (powers the Arduino) |
| OUT1 & OUT2 | Left Motor Terminals |
| OUT3 & OUT4 | Right Motor Terminals |
| ENA | Arduino Pin 10 (PWM) |
| IN1 | Arduino Pin 9 |
| IN2 | Arduino Pin 8 |
| IN3 | Arduino Pin 7 |
| IN4 | Arduino Pin 6 |
| ENB | Arduino Pin 5 (PWM) |
HC-05 Bluetooth Wiring#
| HC-05 Pin | Arduino UNO Connection |
|---|---|
| VCC | 5V |
| GND | GND |
| TXD | RX (Pin 0) or SoftwareSerial RX (Pin 2) |
| RXD | TX (Pin 1) or SoftwareSerial TX (Pin 3) - via Voltage Divider |
6. Arduino Code for Bluetooth Robot#
Below is the complete, production-ready Arduino C++ code for your Bluetooth robot. We use characters 'F' (Forward), 'B' (Backward), 'L' (Left), 'R' (Right), and 'S' (Stop) to control the robot.
#include <SoftwareSerial.h>
// Define SoftwareSerial pins for HC-05
// RX pin 2 (connect to HC-05 TX)
// TX pin 3 (connect to HC-05 RX via divider)
SoftwareSerial BTSerial(2, 3);
// Motor A (Left) connections
const int enA = 10;
const int in1 = 9;
const int in2 = 8;
// Motor B (Right) connections
const int in3 = 7;
const int in4 = 6;
const int enB = 5;
// Variables
char command;
int motorSpeed = 200; // Speed range: 0 to 255
void setup() {
  // Set motor pins as outputs
  pinMode(enA, OUTPUT);
  pinMode(enB, OUTPUT);
  pinMode(in1, OUTPUT);
  pinMode(in2, OUTPUT);
  pinMode(in3, OUTPUT);
  pinMode(in4, OUTPUT);

  // Initially stop the motors
  stopRobot();

  // Initialize Serial Monitor for debugging
  Serial.begin(9600);

  // Initialize Bluetooth Serial
  BTSerial.begin(9600);
  Serial.println("Bluetooth Robot Ready. Waiting for commands...");
}
void loop() {
  // Check if data is available from Bluetooth
  if (BTSerial.available()) {
    command = BTSerial.read();
    Serial.print("Received Command: ");
    Serial.println(command);

    // Execute command
    switch(command) {
      case 'F':
        moveForward();
        break;
      case 'B':
        moveBackward();
        break;
      case 'L':
        turnLeft();
        break;
      case 'R':
        turnRight();
        break;
      case 'S':
        stopRobot();
        break;
      default:
        // Do nothing for unknown commands
        break;
    }
  }
}
void moveForward() {
  analogWrite(enA, motorSpeed);
  analogWrite(enB, motorSpeed);
  digitalWrite(in1, HIGH);
  digitalWrite(in2, LOW);
  digitalWrite(in3, HIGH);
  digitalWrite(in4, LOW);
}
void moveBackward() {
  analogWrite(enA, motorSpeed);
  analogWrite(enB, motorSpeed);
  digitalWrite(in1, LOW);
  digitalWrite(in2, HIGH);
  digitalWrite(in3, LOW);
  digitalWrite(in4, HIGH);
}
void turnLeft() {
  analogWrite(enA, motorSpeed);
  analogWrite(enB, motorSpeed);
  digitalWrite(in1, LOW);
  digitalWrite(in2, HIGH); // Left motor backwards
  digitalWrite(in3, HIGH); // Right motor forwards
  digitalWrite(in4, LOW);
}
void turnRight() {
  analogWrite(enA, motorSpeed);
  analogWrite(enB, motorSpeed);
  digitalWrite(in1, HIGH); // Left motor forwards
  digitalWrite(in2, LOW);
  digitalWrite(in3, LOW);  // Right motor backwards
  digitalWrite(in4, HIGH);
}
void stopRobot() {
  digitalWrite(in1, LOW);
  digitalWrite(in2, LOW);
  digitalWrite(in3, LOW);
  digitalWrite(in4, LOW);
  analogWrite(enA, 0);
  analogWrite(enB, 0);
}
7. Mobile App Setup#
To control the car, you need a Bluetooth Terminal app on your Android smartphone.
- Go to the Google Play Store and download "Arduino Bluetooth Controller" or a generic "Bluetooth Terminal" app.
- Power on your robot. The HC-05 LED will blink rapidly.
- Go to your phone's Bluetooth settings, scan for devices, and pair with "HC-05" (PIN is usually `1234` or `0000`).
- Open the terminal app, connect to the HC-05, and configure the on-screen buttons to send 'F', 'B', 'L', 'R', and 'S' corresponding to arrows and a stop button.
8. HC-05 AT Command Setup (Optional)#
If your HC-05 module has a default baud rate different from 9600 (e.g., 38400), you might need to change it using AT commands. To enter AT mode, hold the small button on the HC-05 while powering it on. The LED will blink slowly (once every 2 seconds).
Send the command AT+UART=9600,0,0 via the Arduino IDE serial monitor (set to "Both NL & CR" and the appropriate AT mode baud rate) to configure it for 9600 baud.
9. Enhancement: Add HC-SR04 for Obstacle Auto-Stop#
Want to make your project stand out? Add an Ultrasonic Sensor to prevent the robot from crashing into walls even if you hold the forward button too long.
Connect an HC-SR04 Trigger pin to Arduino Pin 11 and Echo pin to Pin 12. Modify your `moveForward()` function to continuously check the distance, and automatically call `stopRobot()` if the distance is less than 15cm.
10. Troubleshooting Common Issues#
11. Frequently Asked Questions (FAQ)#
Why is my Bluetooth module not connecting to my phone?
Ensure the HC-05 is powered correctly (5V). If it's blinking rapidly, it's ready to pair. Use the default password '1234' or '0000'. If it still fails, try unpairing and pairing again in your phone's Bluetooth settings.
Why is my robot car moving backward when I press forward?
This means your motor polarity is reversed. Simply swap the two wires of the corresponding motor connected to the L298N OUT1/OUT2 or OUT3/OUT4 terminals.
Can I use an HC-06 instead of HC-05?
Yes, for this project, HC-06 works exactly the same as HC-05 because we only need it to act as a slave device to receive commands from the smartphone.
How long will a 9V battery last?
A standard 9V block battery will deplete very quickly when driving motors (often less than 15 minutes). We highly recommend using 2x 18650 Li-ion cells (7.4V) for longer battery life and better current delivery.
12. Conclusion & Upgrade Ideas#
Congratulations! You have successfully built a Bluetooth robot Arduino vehicle. This project introduces you to serial communication, motor control, and power management. From here, you can upgrade your robot by adding a robotic arm with servo motors, creating a line-follower logic using IR sensors, or upgrading to an ESP32 for Wi-Fi control over the internet.
Don't forget to check out our other tutorials to expand your electronics knowledge!
Products & resources
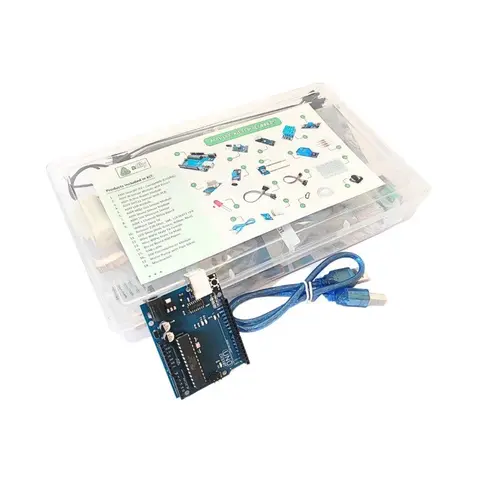
Arduino Compatible
UNO R3 Beginner kit – ADIY
ADIY Uno R3 Beginners Kit is a Stepping Stone for beginners who want to learn about electronic sensors and are excited to make projects. Beginners can learn the basics of UNO programming. Great for Starting with Arduino…
₹1,469
Datasheet
Share