Sensorsbeginneradiy labs
HC-SR04 Ultrasonic Sensor: How It Works, Wiring & 3 Arduino Projects
How the HC-SR04 measures distance, how to wire it to an ADIY UNO R3, basic code, and three hands-on distance sensing projects.
By ADIY11 min read
Technical review pending. Figures marked “verify” or “check your part” have not been confirmed against your exact hardware revision. Check the manufacturer datasheet before relying on them in a design.
1. Introduction — Ultrasonic Sensing and Its Applications#
Welcome to another comprehensive ADIY Labs tutorial! If you’ve ever wondered how bats navigate in the dark or how modern cars beep when reversing towards a wall, the answer lies in ultrasonic technology. In the world of embedded systems and robotics, the HC-SR04 ultrasonic sensor is the most popular, affordable, and reliable component for measuring distance and detecting obstacles.
Whether you're building a smart dustbin, a wall-following robot, or a complex home automation system, learning to interface an ultrasonic sensor with Arduino is a fundamental skill. In this guide, tailored specifically for the Indian maker community, we will dive deep into how the HC-SR04 works, how to wire it up with the ADIY UNO R3, and walk through three complete, practical Arduino projects.
Let's get started on mastering the HC-SR04 ultrasonic sensor!
2. How the HC-SR04 Works#
The principle behind the HC-SR04 is surprisingly simple: it uses echolocation, also known as SONAR (Sound Navigation and Ranging). The sensor has two main components that look like tiny metallic speakers: a Transmitter (Trig) and a Receiver (Echo).
The Sequence of Operation#
- Trigger: The microcontroller (like our ADIY UNO R3) sends a brief HIGH pulse of at least 10 microseconds (µs) to the sensor's Trigger pin.
- Ultrasonic Burst: Upon receiving this trigger, the sensor emits a burst of 8 sonic pulses at a frequency of 40 kHz. This high frequency is well above the range of human hearing (hence "ultrasonic").
- Echo: Immediately after transmitting the burst, the sensor pulls its Echo pin HIGH. It waits for the sound waves to hit an object and bounce back.
- Reception: When the receiver detects the returning echo, the Echo pin goes LOW.
Calculating the Distance#
The time the Echo pin stays HIGH is exactly the time it took for the sound wave to travel to the object and back. By measuring this time width, we can calculate the distance.
We know that the speed of sound in air at room temperature is approximately 340 meters per second (or 0.034 cm/µs). The formula for distance is:
Distance = (Speed × Time) / 2
We divide by 2 because the sound wave traveled to the object and back. So, if we measure the time in microseconds:
Distance (in cm) = Time(µs) × 0.034 / 2
3. HC-SR04 Specifications#
Before connecting the sensor, it's vital to understand its operating parameters. Here are the technical specifications for the standard HC-SR04 module.
| Parameter | Value |
|---|---|
| Operating Voltage | 5V DC |
| Operating Current | 15mA |
| Operating Frequency | 40 kHz |
| Maximum Range | 400 cm (4 meters) |
| Minimum Range | 2 cm |
| Measuring Angle | 15 degrees |
| Trigger Pulse Width | 10 microseconds |
| Dimensions | 45 x 20 x 15 mm |
4. Pin Description#
The HC-SR04 features 4 clearly labeled pins. Understanding their functions is the first step to successful wiring.
| Pin Name | Description |
|---|---|
| VCC | Power Supply Pin. Must be connected to a clean 5V source. |
| Trig (Trigger) | Input pin. Taking this pin HIGH for 10µs initiates the ultrasonic pulse sequence. |
| Echo | Output pin. Goes HIGH while the sound wave is travelling and drops LOW when the echo is received. |
| GND | Ground connection. |
5. Wiring with ADIY UNO R3#
Interfacing the HC-SR04 with the ADIY UNO R3 is straightforward. You will need 4 jumper wires (female-to-male). We recommend using the ADIY UNO R3 for its robust build quality, making it perfect for rapid prototyping.
| HC-SR04 Pin | ADIY UNO R3 Pin |
|---|---|
| VCC | 5V |
| Trig | Digital Pin 9 |
| Echo | Digital Pin 10 |
| GND | GND |
6. Basic Code: Distance Measurement#
Now that everything is wired up, let's write a simple Arduino sketch to calculate the distance and print it to the Serial Monitor in both centimeters and inches.
// Define Arduino pin numbers
const int trigPin = 9;
const int echoPin = 10;
// Variables to hold duration and distances
long duration;
int distanceCm;
int distanceInch;
void setup() {
  // Initialize Serial Monitor
  Serial.begin(9600);

  // Set pin modes
  pinMode(trigPin, OUTPUT);
  pinMode(echoPin, INPUT);

  Serial.println("HC-SR04 Sensor Test Started");
}
void loop() {
  // 1. Clear the trigPin by setting it LOW for 2 microseconds
  digitalWrite(trigPin, LOW);
  delayMicroseconds(2);

  // 2. Trigger the sensor by setting trigPin HIGH for 10 microseconds
  digitalWrite(trigPin, HIGH);
  delayMicroseconds(10);
  digitalWrite(trigPin, LOW);

  // 3. Read the echoPin. pulseIn() returns the duration in microseconds
  duration = pulseIn(echoPin, HIGH);

  // 4. Calculate the distance
  // Speed of sound wave divided by 2 (go and back)
  distanceCm = duration * 0.034 / 2;
  distanceInch = duration * 0.0133 / 2;

  // 5. Print results to Serial Monitor
  Serial.print("Distance: ");
  Serial.print(distanceCm);
  Serial.print(" cm  /  ");
  Serial.print(distanceInch);
  Serial.println(" inches");

  // Small delay before next measurement
  delay(100);
}
Upload this code, open the Serial Monitor (set baud rate to 9600), and place your hand in front of the sensor. You should see the distance changing in real-time!
7. Project 1: Parking Sensor with Buzzer#
Let's build a practical application! In this project, we create a parking assist system. As an object gets closer to the sensor, an active buzzer will beep faster. We will define three zones: Safe (> 50cm), Caution (20-50cm), and Danger (< 20cm).
Additional Wiring:#
- Connect the positive pin (long leg) of a 5V Active Buzzer to Digital Pin 8.
- Connect the negative pin to GND.
const int trigPin = 9;
const int echoPin = 10;
const int buzzerPin = 8;
long duration;
int distance;
void setup() {
  pinMode(trigPin, OUTPUT);
  pinMode(echoPin, INPUT);
  pinMode(buzzerPin, OUTPUT);
  Serial.begin(9600);
}
void loop() {
  // Trigger sensor
  digitalWrite(trigPin, LOW);
  delayMicroseconds(2);
  digitalWrite(trigPin, HIGH);
  delayMicroseconds(10);
  digitalWrite(trigPin, LOW);

  // Calculate distance
  duration = pulseIn(echoPin, HIGH);
  distance = duration * 0.034 / 2;

  Serial.print("Distance: ");
  Serial.print(distance);
  Serial.println(" cm");

  // Parking Logic
  if (distance > 50) {
    // Safe Zone: No beep
    digitalWrite(buzzerPin, LOW);
    delay(100);
  }
  else if (distance <= 50 && distance > 20) {
    // Caution Zone: Medium beep
    digitalWrite(buzzerPin, HIGH);
    delay(150);
    digitalWrite(buzzerPin, LOW);
    delay(150);
  }
  else if (distance <= 20 && distance > 0) {
    // Danger Zone: Fast continuous beep
    digitalWrite(buzzerPin, HIGH);
    delay(50);
    digitalWrite(buzzerPin, LOW);
    delay(50);
  }
}
8. Project 2: Obstacle Avoidance Robot#
One of the most exciting projects for engineering students in India is building an autonomous robot. By combining the HC-SR04 with a motor driver (like the L298N) and an SG90 servo motor, we can create a robot that "looks" around to find a clear path.
Concept Overview:#
- The robot moves forward continuously.
- The HC-SR04 continuously checks distance.
- If an obstacle is detected within 30cm, the robot stops.
- The servo motor pans the sensor left, then right.
- The robot compares distances and turns towards the side with more open space.
Note: Full integration code involves servo and motor libraries. Check out our L298N Motor Driver Guide for the complete robot chassis assembly instructions!
9. Project 3: Water Level Monitor#
Water scarcity and tank overflow are common issues in many Indian households. You can use an HC-SR04 mounted at the top of an overhead water tank to monitor the water level. By knowing the total depth of the tank, you can calculate the water volume percentage.
The Math:#
If the tank is 100cm deep from the sensor to the bottom, and the sensor reads a distance of 30cm to the water surface, the water depth is 100 - 30 = 70cm. Therefore, the tank is 70% full.
const int trigPin = 9;
const int echoPin = 10;
const int TANK_DEPTH = 100; // Tank depth in cm
long duration;
int distance;
int waterLevel;
int percentage;
void setup() {
  pinMode(trigPin, OUTPUT);
  pinMode(echoPin, INPUT);
  Serial.begin(9600);
}
void loop() {
  digitalWrite(trigPin, LOW);
  delayMicroseconds(2);
  digitalWrite(trigPin, HIGH);
  delayMicroseconds(10);
  digitalWrite(trigPin, LOW);

  duration = pulseIn(echoPin, HIGH);
  distance = duration * 0.034 / 2;

  // Calculate water level parameters
  if(distance <= TANK_DEPTH) {
    waterLevel = TANK_DEPTH - distance;
    percentage = (waterLevel * 100) / TANK_DEPTH;

    Serial.print("Water Depth: ");
    Serial.print(waterLevel);
    Serial.print(" cm | Tank is ");
    Serial.print(percentage);
    Serial.println("% FULL");
  } else {
    Serial.println("Error: Reading exceeds tank depth!");
  }

  delay(1000); // Check every 1 second
}
10. Using the NewPing Library#
While the standard pulseIn() method works, it is a "blocking" function. If the sensor misses an echo, your Arduino code will freeze for a second waiting for it. To solve this and write cleaner code, we highly recommend the NewPing library.
How to install NewPing:#
- Open Arduino IDE.
- Go to Sketch > Include Library > Manage Libraries.
- Search for "NewPing" and click Install.
Here is how simple your code becomes with NewPing:
#include <NewPing.h>
#define TRIGGER_PIN  9
#define ECHO_PIN     10
#define MAX_DISTANCE 400 // Maximum distance we want to ping for (in cm)
// Initialize NewPing object
NewPing sonar(TRIGGER_PIN, ECHO_PIN, MAX_DISTANCE);
void setup() {
  Serial.begin(9600);
}
void loop() {
  delay(50); // Wait 50ms between pings (about 20 pings/sec).

  // Send ping, get distance in cm and print result
  Serial.print("Distance: ");
  Serial.print(sonar.ping_cm());
  Serial.println(" cm");
}
11. Troubleshooting Common Issues#
Working with the HC-SR04 is usually smooth, but if you run into issues, check these 5 common problems:
- Readings are always 0: Check your wiring. Ensure Echo and Trig pins aren't swapped in code or on the breadboard. Also, make sure VCC is firmly connected to 5V.
- Fluctuating/Random values: The target surface might be angled, deflecting sound waves away from the receiver. Ultrasonic sensors work best on flat, hard surfaces. Soft materials like cloth absorb sound and give poor readings.
- Code freezes: If you are using
pulseIn()without a timeout, a missed echo will pause the code. Switch to the NewPing library or add a timeout parameter:pulseIn(echoPin, HIGH, 30000). - Sensor gets hot: Immediately disconnect power! This usually means VCC and GND are swapped.
- Noise Interference: If you are running high-current DC motors near the sensor, electrical noise can affect readings. Use separate power supplies or capacitors across the motor terminals.
12. FAQ#
What is the maximum range of the HC-SR04 sensor?
A: The HC-SR04 ultrasonic sensor can measure distances from 2cm up to 400cm (4 meters), though accuracy and reliability are best within the 2cm to 300cm range on flat surfaces.
Can I use the HC-SR04 with a 3.3V board like ESP32 or Pico?
A: The standard HC-SR04 requires 5V. To use it with 3.3V logic boards, you must use a logic level converter or a voltage divider on the Echo pin to avoid damaging your microcontroller's input pins. Alternatively, use a 3.3V compatible version like the HC-SR04+.
Why is my HC-SR04 reading 0 or bouncing randomly?
A: This usually happens if the target surface is angled (deflecting the sound away), sound-absorbing (like soft fabric), or simply out of range. Check your wiring, ensure standard 5V power, and verify your delay times in code.
What is the NewPing library?
A: NewPing is a popular third-party Arduino library that greatly simplifies writing code for the HC-SR04. It handles ping timing more accurately, is non-blocking, and easily supports multiple sensors simultaneously.
Products & resources
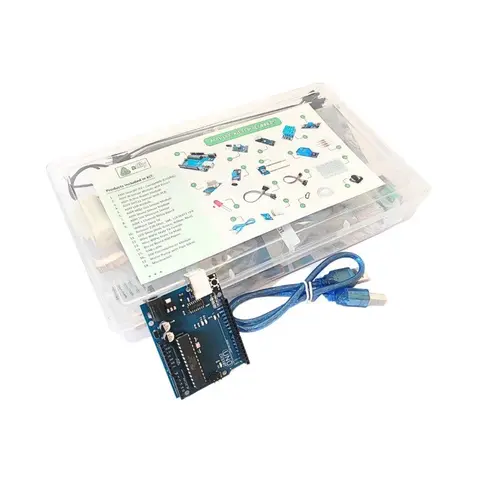
Arduino Compatible
UNO R3 Beginner kit – ADIY
ADIY Uno R3 Beginners Kit is a Stepping Stone for beginners who want to learn about electronic sensors and are excited to make projects. Beginners can learn the basics of UNO programming. Great for Starting with Arduino…
₹1,469
Datasheet
Share